
Nexus 7 (First Gen) Battery and I/O Ribbon Replacement
An ex-coworker asked me if I could look at her nephews Nexus 7 (First Gen) and find out whats wrong with it – offer $20 to fix. She said it was completely dead and would not even charge.
Her nephew is 10 years old so of course I had to ask the usual stuff like if he did something to it or if it got wet and the like. Seems it just one day wouldn’t charge and that appears to actually be an issue with the first gen Nexus 7 tablets.
Well I looked it over and it had all the signs of a dead battery so I looked around the net for battery prices and found a few sites selling OEM batteries. I gave her mom the URLs to check out and described what I thought was the issue, letting her decide on whether to purchase a new battery and she did. I did try to sell her on getting her grandson an iPad or iPad mini which, to me, is a bit more useful scholastically. Dont get me wrong, I own a Nexus 7 First Gen myself but also an iPad where my kids sometimes use iTunesU or download books to read.
After replacing the battery I also found that the charging port was bad. If I held the charging cable a certain way I could get it to charge but that is not a solution. I wager what happened is that the charging cable was in the unit as someone was walking around with it and the cable pulled, damaging the port. I let my ex-coworker know about the port issue and she asked me how long it would take to fix it because the little boy was flying back home the next day.
I cant have a sad boy on my hands so I took the audio/charging ribbon from my Nexus 7 and put it in his. Perfect match since both are first gen units and the battery charged up nicely. I ordered a replacement cable on Amazon. His mom wanted to pay me for it but I just told her the only requirement I have is that her grandson perform a random act of kindness someday. I dont plan on taking her up for repayment for the part or whatnot.
The process of replacement for both battery and charging port should be the envy of iPad owners as well as other tablet owners where the OEMs almost liquid nails their products shut. In a nutshell, most tablets are not made to repair but made to be replaced as the technology changes. Anyway, here are my steps for replacing the Nexus 7 parts which is by far the easiest and quickest hardware repair I have ever done.
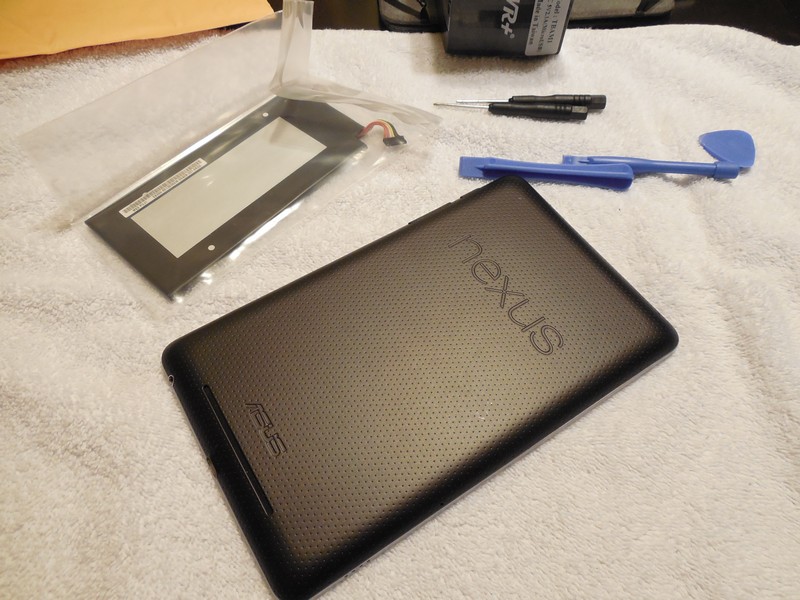
Steps Gallery
-

- Carefully separate the back cover from the display panel using a plastic tool, prying at different points from the top and working around.
-

- Separated cover plate. Do not pry too hard because the tabs can break off easily.
-

- Inside view of main hardware on left, back cover on right.
-

- Identify the battery cable and socket.
-

- Peel the black tape back from over the socket.
-

- With a plastic tool, lightly push the cable out of the socket, working from left to right.
-

- Use the plastic tool to lightly pry up around the battery to loosen it from the adhesive strip holding it in place.
-

- Battery successfully separated.
-

- Reconnect the battery cable to its socket, making sure it is firmly seated and fold the black tape back over it.
-

- Remove screws securing the speaker assembly to the display assembly and lift it out of the way.
-

- Remove the screws holding the I/O assembly cable.
-

- Use a spudger to carefully flip up the black retaining flap on the I/O assembly cable socket just behind the charging port and separate the cable from the socket. I used a plastic screwdriver modified as a spudger.
-

- Carefully lift the audio jack and charging port from its plastic seating pins.
-

- Replace the I/O assembly cable in reverse of how it was removed and carefully ensure the white data ribbon cable and socket are securely mated and that the retaining flap is locked down.
-

- Re-attach the back cover of the device, plug in the charger and turn it on. Remember its a new battery so it will likely need charging.