
Bitnami WordPress Virtual Machine
 When pushing websites, even my own personal, I would rather screw up in a staged environment rather than pushing something live and finding out the site is hosed or dysfunctional in some way. I recently came across Bitnami’s site and saw that they had a free self-contained WordPress virtual machine (virtual appliance) so I thought I would give that a try and share a bit of the experience. I currently run WordPress on my domain but simply wanted something I could use and stage on even if I lost connection with the net. Among using it as my stage environment, I can also use it for other things such as theme or plugin development.
How It Works
Essentially, the way this works is you are using a server that is running on your local computer, which the virtual machine is providing, and using your internet browser to log into that server like you would to log into any WordPress site but by its IP address (ex: http://123.123.123.123/wp-login) rather than a domain name like http://www.mysite.com.
The virtual machine contains a minimal Linux OS (Ubuntu Server 14.04.01 LTS) and a fully configured Bitnami application stack, meaning it has a group of all applications necessary to get started right away with WordPress such as the latest ready to run versions of WordPress, Apache, MySQL, Varnish, PHP and phpMyAdmin. You simply start the server, point your web browser to it and log in.
Caveat – Sort Of
Ubuntu Server does not include a GUI but a command line by default so I decided to install as thin a desktop as possible that would be light on resources and give me basic functions in the OS and went with the lightweight Lubuntu LXDE desktop environment. The VM will only be used on my home network so security wise I’m only concerned with local login to the VM, and having the desktop will let me do admin stuff on the fly.
To install minimal Lubuntu desktop without all the recommended applications, once booted to the command line of the virtual machine:
- Type: sudo apt-get install –no-install-recommends lubuntu-desktop
- Click ENTER
If you get an error then drop to the root prompt and try it like below (you will be prompted for the admin login):
- Type: sudo su
- Click ENTER
- Type: apt-get install –no-install-recommends lubuntu-desktop
- Click ENTER
You will get a few prompts to answer, the VM will reboot and you will see the desktop login prompt. If you don’t see a blank username prompt to log into then click the drop down box and select Other.

Lubuntu Desktop Login
Access the Server (Virtual Appliance)
As explained on the Bitnami WordPress Virtual Machine webpage the default username and password are both “bitnami”. You may have seen a reminder of this during the first time the VM booted up. Once you have logged in the first time, you will be prompted for a new password so use that to log into the virtual machine.
Getting Started
Open a web browser and type in the IP address of the virtual machine. If you do not know it, look on the Bitnami command console window (if you did not install a desktop) or log into the server, go to System Tools > XTerm and type ifconfig at the terminal command prompt.
Your IP address will be listed as inet addr:XXX.XXX.XXX.XXX. On success, you will land on a very plain and very bland sample WordPress page with Hello World in it. Under the META section, click on Log in or append /wp-admin.php to the end of the IP to get the WordPress login page (http://123.123.123.123/wp-login.php). From here, log in with the username: user and the password: bitnami to get to the WordPress dashboard, configure your settings, import data, install themes, etc., and you are off and running.
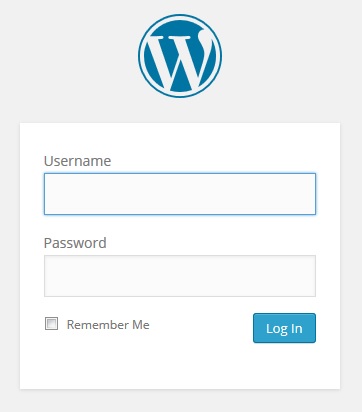
WordPress Logon
I have a free WordPress account on WordPress.com but since getting my website some time ago I don’t use it as frequently since it lacks the ability of plugins and the flexibility that I need unless I pay a premium. For the cost of a premium account I can have my own so made no sense. I exported all the data from the free WordPress site using their export tool and imported into my website when I started it to save me some time. I used the same exported data, logging into the virtual machine and importing it from within WordPress. This gave me my content to work with and saved me quite a bit of time.
RESOURCES
Bitnami Virtual Applicance Quick Start Guide
How to Export and Import a WordPress Blog
REQUIREMENTS
To install Bitnami WordPress Stack you will need:
- Intel x86 or compatible processor
- Minimum of 256 MB RAM
- Minimum of 150 MB hard drive space
- Compatible operating systems:
- x86 or x64 Linux operating system.
- Windows XP, Vista, 7, Windows 8 or Windows Server 2003 or greater.
- OS X operating system.
- VMware Workstation, VMware Player, or VirtualBox